iShareSoftware Video Editor
Easy-to-use video editor, make your video stand out Customize home movies with advanced editing features and get professional-caliber work in minutes.
How to edit and add subtitles to your videos easily
iShareSoftware Video Editor is the best desktop app to work with subtitles. With this subtitle editor, you can search, edit, and import local and online subtitles effortlessly. Users can time out subtitles at exact moments, even in short videos. It can also adjust the font size, color, position, and transparency. Additionally, you can position subtitles to appear at the top, middle, or bottom of the playback screen. Moreover, you can convert your subtitle video to VOB, FLV, AVI, MP4, MOV, etc. So, let’s see how to edit and add subtitles to a video using this app.
How to add a video subtitle with iShareSoftware Video Editor.
Here's a simple handy guide for you to add subtitles to MP4, AVI, MKV, any video format as well as your digital/DVD movies, TV series and music videos. You can add .srt, .ass, .ssa and .sub subtitle files to the video and output as Hardcode Subtitle or Soft Subtitle as choice. Easy steps to extract subtitles from video to srt/ass/ssa files can also be found here.
Hardcodec Subtitle: The subtitle you added to the video, which can be image subtitle or text subtitle. Hardcode Subtitle can't be removed or turn on/off during the playback.
Soft Subtitle: The subtitle your video contains originally, which is usually a specially marked-up text with time stamps. So it can be turned on and off during the video playback.
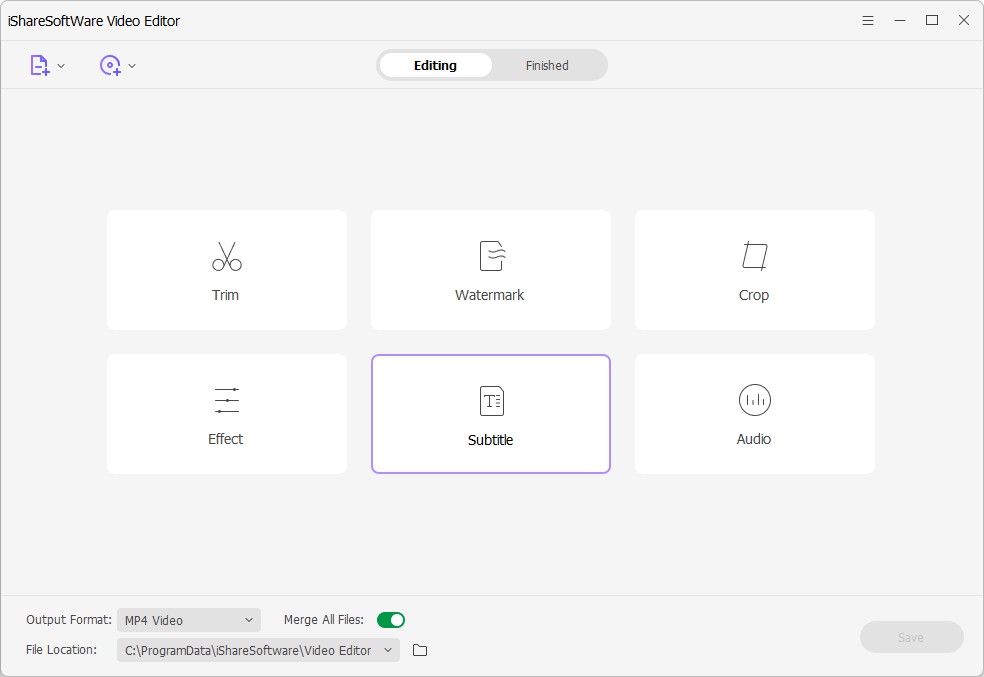
Step 1 Get editing window.
If your video has no subtitle track, click the Subtitle to open your local storage and add the video file. Your video should start playing automatically on the subtitle editor.

Step 2 Import subtitle files.
On the resulting window, you should see the following controls:
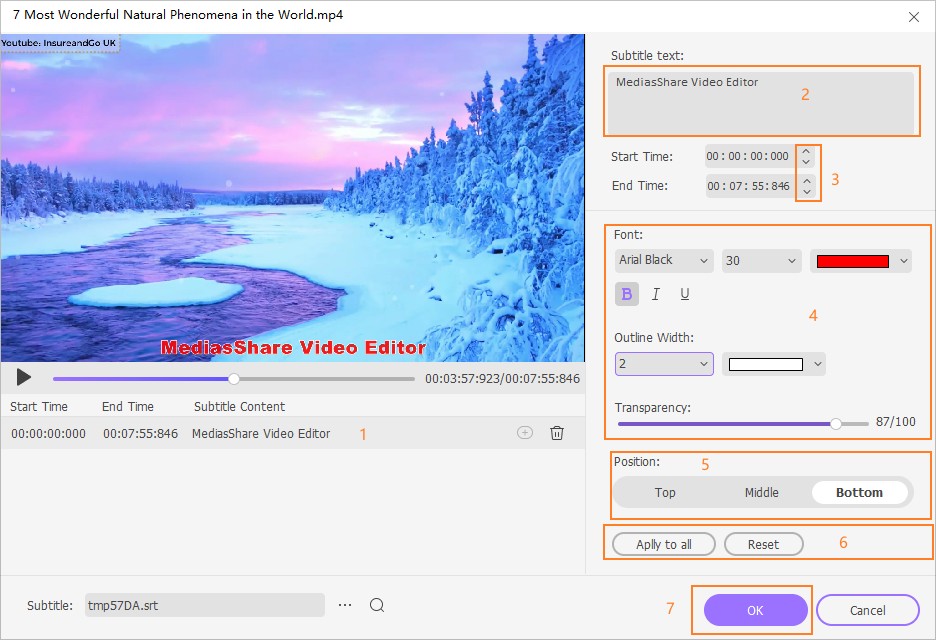
Create Subtitles: Pressing this button allows you to enter your own subtitles with custom timeframes, fonts, colors, position, transparency, and size.
Search Subtitles: If you have no idea where to begin your subtitle search, click this button to download thousands of subtitles for popular music and video files.
Import Subtitles: For those with a locally saved subtitle, click the Import Subtitles button and then tap Add to import that subtitle on your video.

To enter custom subtitles, click the Create Subtitles, then enter the subtitle text inside the textbox at the top-right corner. Now proceed to enter the Start Time and End Time manually. Alternatively, use the up (˄) and down (˅) buttons to select a specific time for the subtitle. You’ll see the subtitle appear below the preview screen next to the Add and Delete icons. Click the Add to save the new subtitle and apply the next one. Repeat the process until you are satisfied. Don’t forget to customize your subtitle tracks to make them look more appealing, and then press the Apply All. Hit the OK to close the window.
Step 3 Save videos with hardcodec subtitles embeded.
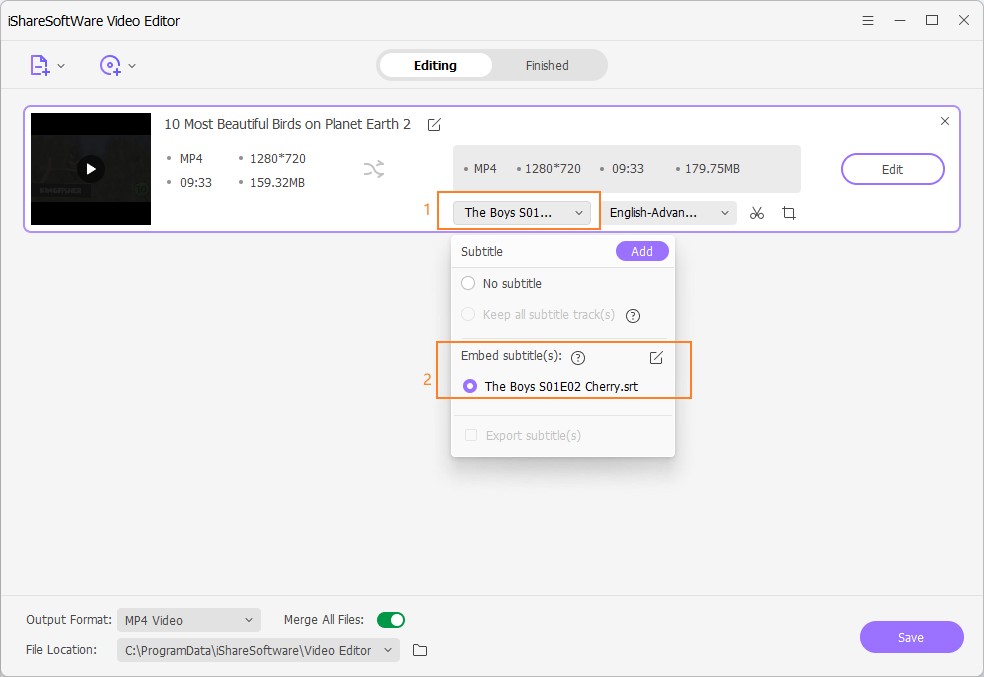
Click the Play icon on the video thumbnail to preview it. If you want to make adjustments, press the subtitle drop-down menu right below the video format and then tap the Edit Subtitle pencil-like icon.

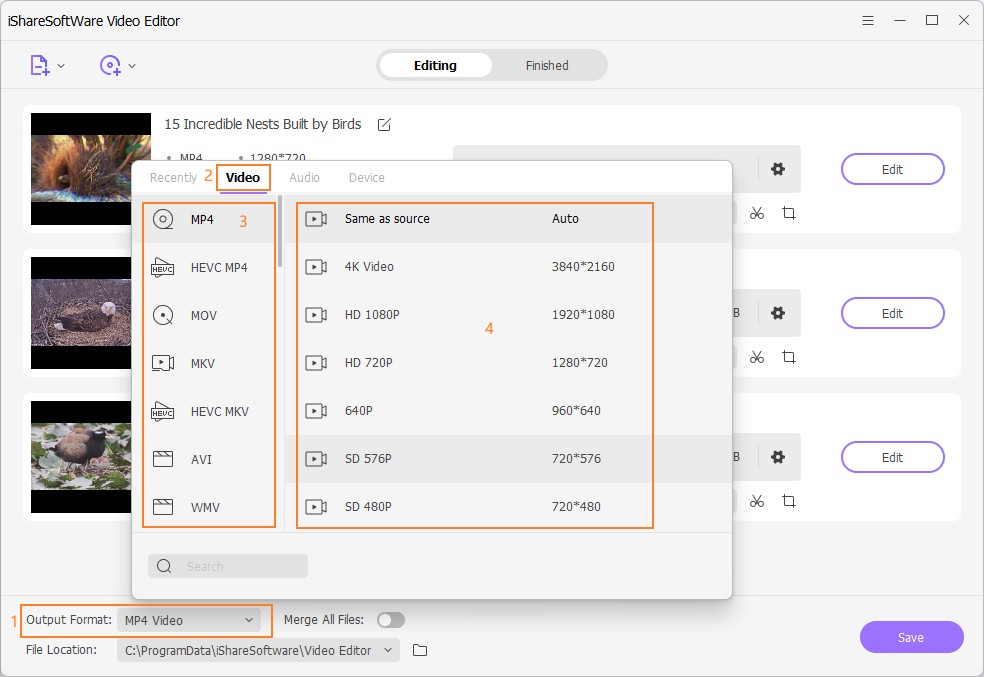
Choose the MP4 or MOV format as output from the Output Format: drop-down list. Remember only MP4 and MOV video formats allow turning on and off any subtitles when watching on TV. Finally, click on the Save button to save all changes and convert the video. If you have extracted subtitles, the subtitle files can be found by opening the folder-like icon under the Finished tab.

- Rotate/crop video, customize the frame size (16:9, 4:3 etc.) and cut off black margins.
- Add image/text watermarks to video for copyright protection.
- Add SRT, SSA, ASS format text subtitles to the video to better explain.
- Abundant video effects such as holiday, wedding, retro, vintage, TV wall, etc., support one-click application.
